Showing posts with label Kelly L Hendrickson. Show all posts

Tuesday, January 26, 2016

And FINALLY!!!

I can hardly believe it has been so long since I posted here.  Life has taken some major course changes and quite a few curve balls have landed in my court.  One was....we moved to another state! After we arrived I began setting up my new studio. It was really scary because I could not find this piece anywhere! Only recently did I just happen upon it when searching for something else! OH HAPPY DAY!! Could I have started over...yes. But I very carefully picked the fabrics for the background on this one.  All that was already done. All I had left to do was the hurricane. It would have always been second best in my eyes because many of the original fabrics are one of a kind and no remnants are left! Whew - tragedy averted!!

So here it is. My fourth and final piece for Voyage 2015 - Abstracted Nature for which I chose the series theme of "Forces of Nature."  For this piece I chose several circular motifs from my won surfaced designed stash. Some are stamped, some are resists and some are sunprinted. I felt they provided the continuity of the circular motion of the hurricane in the Gulf of Mexico. As a native Texan...this is not a stretch for a concept in this series! The "land" fabric is a pounded fabric which I felt had the beautiful look of a topographic map.

The hurricanes are unstoppable and often seem to have a mind of their own. Just when we think we know
the direction they will take and where landfall will be...it can change and head along a totally different path. Sometimes that is for the better but other times that change can cause widespread destruction. This lack of predictability is why I chose the title "Winds of Change"

WINDS OF CHANGE

So now all four of the series are completed. Since it has been a while since I posted the previous three (which I had completed in March of 2015! - a great start interrupted) I thought it would be fun to post all four of them as a photo collage.

FORCES  OF  NATURE
Over the Edge, Fire in the Desert, Danger Below, Winds of Change


Of course all this means I'm starting behind for 2016 but I think I'm up for the challenge!!


Wednesday, May 27, 2015

Three Done and Dusted - One To Go

I have completed the third piece for the Voyage Group theme entitled "Abstracted Earth"

This is a piece for my series in this theme entitled "Forces of  Nature".  It is an iceberg with the largest portion below the water. The title of this piece is "Danger Below". As usual, all these are my own hand-dyed and surface designed fabrics. The one exception is the top layer of the iceberg which is above the water. That is a loosely and randomly woven piece of fabric from a friend. I think it makes the perfect iceberg top!

DANGER  BELOW


The fourth and final piece for this year for Voyage has been started. The plan is to have it ready before I leave for Duluth for the Minnesota Quilters Association Annual Quilt Show 2015.  More about that later!

Linking this up to Nina Marie's Off The Wall Fridays!! Lots of beautiful creations to see. Drop by for a visit!

Friday, March 27, 2015

The Final Act?

Yep...it snowed a bit. Just a dusting really. Only about an inch. BUT...I grabbed the shovel and managed to scrape up enough to do a couple of 1-yard pieces!! It took all the snow on the front patio but I did it!

And I think it was so very worth it. This time I did both pieces dry and not soaked in soda ash. I sprinkled on the soda ash with the dye powder in between the two layers of snow.

Piece one - I grabbed the 1 yard piece and tied a knot in the middle, then in the middle of the remaining ends and finally I tied the loose ends together

Piece two - I folded the lengthwise piece in half then both sides in half again...accordion style. Put a long rubber band around it just to hold it in place.

Knotted

Folded

Is this snow dyeing adventure over here in the frozen tundra? One never knows!!! 

I'm linking this to Nina Marie's Off The Wall Friday. Be sure to stop by there and see amazing work by very talented artists!

Sunday, March 1, 2015

Fire In The Desert and Over the Edge

Completed my second piece for Voyage 2015 last night!! And I love it! Sorry...but I really do like how it turned out! Both of these pieces are made with my own hand dyed and surface designed fabrics and created with raw edge applique.

My series for the 2015 Voyage Theme of Abstracted Nature is "Forces of Nature". My first piece was "Over the Edge" - the lava flow.


And the second piece I just finished last night is "Fire in the Desert" - lightening 

My two remaining pieces to complete are "Danger Below" - iceberg and "Winds of Change" - hurricane. I can hardly wait to start the next one!!!

Friday, February 27, 2015

Frosty The Recycled Snowman

OK...so I never actually BUILT a snowman but if I had....this is where he would have ended up!

I so loved the results of snow dyeing with soy was resist I just HAD to do it again! This time I did an experiment with the soda ash. One piece was pre-soaked in soda ash and the second piece was just PFD right off the bolt. On that piece I sprinkled the soda ash on along with the dye powder.

The procion dyes I used were Victorian Blue, Turkey Red, Smoky Grey and some Pewter

And here are the fun results. I used my new favorite resist applicator....my empty tea tin!!!

Piece One - Pre-soaked fabric, snow, dye powder, more snow


Piece Two - Non-soaked fabric, snow, dye powder, soda ash, more snow

One think I noticed is that the colors mixed more with the pre-soaked fabric and kept their distance a bit more with the sprinkled piece. I love them both....just depends on what look you are going for!

I'm linking this to Nina Marie's Off The Wall Friday. Stop by and see what many amazing artists are up to!


Tuesday, February 24, 2015

The Ice Dye Cometh

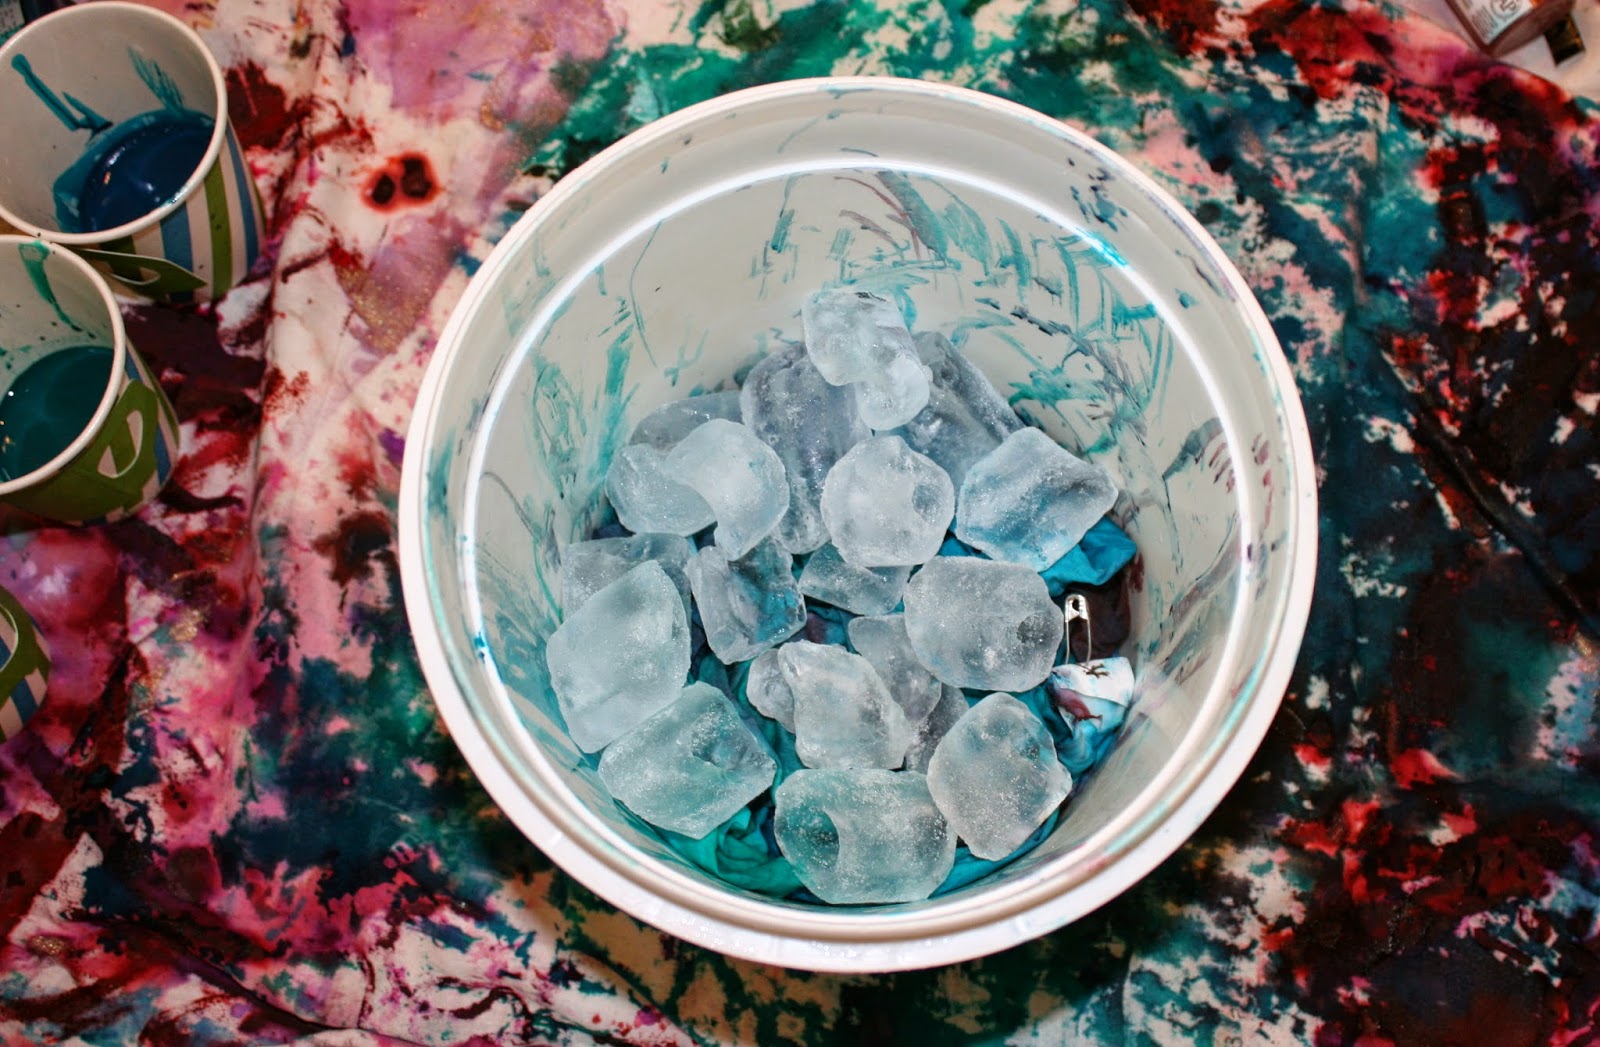
Oh what wonderful things can be done with ice!! This experiment today with ice dyeing is done with Soy Wax resist. And....since I ran out of ice...other pieces are done with snow (which I'm not running out of) and Soy Wax resist.

First was to choose the items to use for applying the soy wax. I love to use things meant to be for other things.  This session I chose:

A potato masher

A computer part (something about a fan cover or something) Also just dabbed some spots on the edges with an old paint brush.

A small wire brush along with the computer circle part in the center

A metal can that used to be filled with loose tea

And finally, the tea can along with the computer circle part

I prepared the containers by putting grates or small cups or whatever would raise the fabric up so that it would not sit in a pool of melted ice. Then I scrunched the fabrics a bit and placed them on top of the raisers.


The piece using the circular computer part and the dabs of wax with a paint brush I crunched and put ice cubes to cover it. The rest were covered with snow at this point. All were then sprinkled with dye powder and then a layer of snow was added to keep the dye powder wet.

Then it was just a matter of waiting until the ice/snow melted. I always plan at least overnight for this process. My studio is warm enough to handle that or sometimes I place it in my batching closet where it is usually about 70 degrees F. 

The final parts are to rinse, wash and iron.  Then to see the wonderful results.....

Computer circles and paint brush dabs with Brushed Steel dye

The small wire brush with the computer circle and also the potato masher
with Turkey Red dye


The tea can and the tea can with computer circles with Victorian Blue dye


I so totally LOVE these results. You can be assured there will be more soy wax resist snow/ice dyeing in the coming days!!


Saturday, February 21, 2015

It Came From Outer Space!!

No...not really. It just looks kinda like it might have!

Believe it or not...this is a THREE yard piece of fabric before all the rubber bands! In the end it was more like 1 1/2 to 2 feet! OK...don't ask me how many hours it took or how many rubber bands. I have no idea. The answer would be more like "A lot of both!" I actually lost count.

Anyway, this piece had originally been white PFD which I had dyed Cayman Island Green using yogurt cups. But either not enough dye powder or it was too light a color but it came out quite boring and not texture at all.  So...time for another treatment.

I can tell you that it took several nights watching TV to get all these rubber bands in. When it was finally done, it looks like some demented catepillar!


Then I put it on a screen grid in a large plastic container and covered it with snow. Then sprinkled dye powder (Golden Brown) It slept in the batching closet overnight and the next day....after much wringing out and rinsing and washing...this is the result. There are two photos. Even on my design wall I could only do half of it at a time.so these are the two parts.


Not sure yet what it will be but it has potential. The bottom photo kinda makes me think of a cobblestone patio or something. Fun in the snow again!!


Friday, February 20, 2015

Ice Painting

What better art can one do in the winter in the Frozen Tundra than Ice Painting????

It is a variation on Pounded Fabric in my opinion. Interesting results though.

The first set I painted liberally first and then scrunched into the containers. This time I used DynaFlow paints and started with undyed, white cotton (PFD)

Painted fabric

Ice cubes placed on top of the painted fabric. This turned out to be too much ice.


Then let the ice begin to melt in the studio...not in the batching closet. You can already see the paint starting to disperse

A few days later the ice was all gone. The fabric was put into the batching closet to dry completely.


When it was dry it was ironed. And this is the result. Very pale color and both will get additional work on them. Perhaps too much ice and not sure about the DynaFlow. More experimenting!!!


Next I found some hand dyed pieces that definitely needed work. I scrunched these in a tray and put paint on them (dabbing and swiping). I used watered down acrylics for this set. Just colors that I had lying around...and that would blend in well with the boring flat dyed pieces. I also used some metallic paints on them as well. A girl has to have her bling!!! 

 Top to Bottom - Piece 1 then Piece 2

Top to Bottom - Piece 3, Piece 4 and Piece 5


Then I placed some ice cubes on top of them. No photos though...end of the day...very tired....enough said. The tray was placed in the batching closet and two days later the ice had melted and the fabric was completely dry. Then ironed them. And the final results.......

 Piece 1

Piece 2

Piece 3

Piece 4

Piece 5

I like them all, but piece 3 will get a little more loving attention shortly

So in the spirit of Frozen Tundra exploration....Ice Painting is a winner!! And since it is Friday....I'm linking this post to Nina Marie's Off The Wall Friday!! 


Friday, February 28, 2014

Another Little Crooked House

This month the theme for one of my groups was Contrast.  My mind goes first to the B/W I love but I wanted to stretch a bit more and not be too predictable. Lots of ideas and lots of thinking.  Finally decided on contrasting Color with the B/W. Figured I would design a cute house as the main bit. Remembered my favorite photo of a Crooked Little House and thought that would make a great inspiration for this theme.  I made the little house in B/W and then on with Colors (there is also a contrast in using the pastels for the backboards of the house and brights for the boards in front).  Here is one of the little crooked houses in contrast.  BONUS!! I also have another one!!! It is still on the design wall ready to be completed later today I  hope. This one still needs the binding as well.  Busy busy later today!!!

Crooked Little House in Contrast

Here are the two pieces before cutting them and stitching/quilting them mixed up.I just feel like there will be another one made and kept as the B/W...it is just too cute!


I'm linking this to Nina Marie's Off The Wall Friday

Sunday, February 23, 2014

Binding Done!!

Well, I made it! I've done pieced bindings before but this one was a bear...all the angles and bits. It took all day but it was worth it!


Thursday, February 20, 2014

First of a New Series

This is the first piece of a new series I'll be doing this year.  The series is "Earth's Amazing Wonders"  OK...I know...it is not exciting so I'll just call that the working title.  There will be at least 6 pieces done in textiles which will depict (or suggest) places that I find awe inspiring. I have the first several in the list. The remaining couple or three I've not narrowed down as yet. Oh I have my favorites though, it will just depend on what rises to the surface when the time comes.

First up is Antelope Canyon in Arizona.  When you look at photos of this location, it seems like someone when nuts with their PhotoShop. The colors are amazing and the contours of curving rock are beautiful.This is a view inspired by several photos...looking through the jewel-tone rock to a beautiful clear sky.  I hope I did it justice.


It does not yet have a binding as I have been struggling with just what to do. My current plan is to do a pieced binding that will just fit in with each part of the fabrics.  This art quilt also has a lot of stitching on it. I haven't done this amount of quilting in ages.  All the contour lines are stitched. At first I thought it would be a bit boring to do but it actually took on a rather organic feel as I didn't work to make the lines exact but rather made the undulate on purpose to pick up the flowing feeling of the actual rock.

I am linking this to Nina Marie's Off The Wall Fridays. Click there to see the work of some amazing artists!

Thursday, February 13, 2014

Challenge Accepted!

OK, so the theme for January was On The Buses.  I had no idea what on earth that was about.  So, I visited my old friend Google....figuring to find scenes of people on buses, views from buses, etc.  What I DIDN'T expect to find was that "On The Buses" was a sitcom out of the UK!! As that was stumbled upon about 1am, I went to bed thinking about the theme. Before I fell asleep I knew what I wanted to do. I was inspired by one of the promo pictures for the show which used a green bus. From scenes from the actual show, I guess they usually involve the normal red buses but there was at least one scene photo with a green bus. In the morning I picked out fabrics from my hand-dyed collections.  Found the green I wanted then the background, a transparency for the windows and an old drop cloth from years ago that I kept because I thought it looked so cool.

First I FMQed a sort of cityscape (with a small hint of a nod to Big Ben). Nothing exact. I was going with the comic feel. Cut out the bus, placed the windows in the slots. Behind the windows was the fun drop cloth...again going with the fun comic feel.  I looked at putting round wheels but it all got to kitchy for me. Then I found a black very long rubber band to represent the tires. Now it was all too symmetrical. In the promo picture, there was the name of the show in red on the green bus so I grabbed a strip of red and it was just the bit of asymmetry that it needed. And here it is.....

FUN  IN  THE  CITY

Nope, this piece will never hang in the Louvre, but I had fun doing it...and since the theme fit with the sitcom...that seemed appropriate.

Tuesday, February 11, 2014

One that had to be done

The theme for November in one of my online groups was Cosmos.  I knew immediately what I wanted to do...but my life was in turmoil and chaos and didn't calm down until just this week. I'm now looking at current deadlines and putting on my thinking cap. (Some of them are quite a challenge BTW!!!) But while I'm starting over fresh for 2014 in this one group (I was WAY too far behind to ever catch up) I just HAD to do this one.  It was originally planned for a much larger piece but doing it in 12" X 12" just seemed to be what the doctor ordered since the larger one had its beginning a few years ago and then went nowhere.

So...here it is....Deep Space.  It was inspired by a Hubble photograph of the Orion Nebula. I just love the colors and found I could make just what I wanted with hand-dyed cheesecloth!!

DEEP  SPACE

I'm linking this post to Nina Marie's Off The Wall Friday!


Friday, February 7, 2014

The Brain Finally Kicks In

It is not often that I have to think very long or hard about a theme or concept I want to do for a series.  But after the two latest major deadlines, I think my brain went on a short vacation!  But the time-out had the desired effect!!

In one of the online groups I belong to, we get to choose our own projects and create at least 6 pieces for the year.  Last year was the Pecan Series.  This year I'll be working from some favorites of my own photos taken of "distressed" barns.  I'm so excited to be doing this series. Anxious to get started.  Here are 3 of my most favorites that will definitely be on the list.  Now to choose the remaining 3 from the other gazillion barn photos in my collection!

When I was copying these photos to put into my inspiration file for this series, the names just came to me.

Patchwork
  
Coming Unhinged

Windswept

Now to get my studio at least cleaned up enough after the past several frantic months so I can begin!!

Tuesday, January 21, 2014

Pushing the deadline again!

One of the online groups I participate with is having a group show in Beaujolais, France. The show is in April.  Because of all the work I had to complete to be ready for my solo show this month, this project got a bit behind.  I have to complete the other two pieces (which are well under way so don't worry.) and get them shipped to Europe by the end of the month.....yes.....this month.

Oh I must LOVE a challenge!!

My theme for this series is "Up Close and Personal"  The concept is to use macro photos I took myself and redo them in art quilts. I have to say...I have had so much fun with these pieces!! The previous ones are already posted in this blog if you want to see them.

Anyway, here it is......Rusty Leaves is completed!! Here it is below (on the right) along with the original macro photo on the left.

Rusty Leaves
17" X 12"

Now back to work!!! I'm linking this to Nina Marie's Off The Wall Friday!! 

Tuesday, January 14, 2014

After the Show

Now that the opening is over, I would like to post the four pieces that make up the Pecan series.  Each of these works is 30" X 30" mixed media/textile. 

Are you ready?

The  Sapling
 One small tree, full of the promise of things to come. Holding within itself all 
the potential for the future harvest.

Summer  Grove
Growing life is all around, from the closest tree to the ones along the far hills. 
Encouragement that all is as it should be and moving in the right direction.

Emergence
The fruits of labor and nature combine to begin the emergence of the long
held hope as it peeks out of its protective covering to take on the world.
(This one is sold)

Winter  Harvest
At long last, the promise is fulfilled. The potential is realized. The harvest is 
at hand and all the work and waiting proves worthwhile.

I hope you enjoy them!