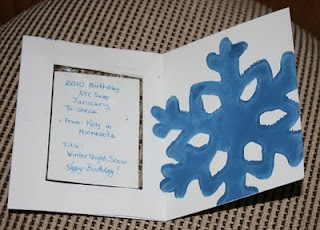
I encased the ATC in between two layers of sheet protector and sealed it with an iron (between two Teflon ironing sheets!) Then I stamped white card stock with blue snowflakes. I folded the card and cut the window out. I glued the sheet protector package to the inside of the card fold, sprayed adhesive on the inside and folded the card. This is designed for the ATC to be removable. This is the front of the card (obviously!)
This is the inside. The writing you see is on the back of the ATC.
Then I made printed a white cardstock page with this snowflake pattern, cut out the envelope form, folded and glued the edges. Then the card was placed in the envelope and it is ready for the mail! I covered the mailing label just so the address would not be posted.


4 comments:
Very creative. Thanks for explaining the process.
what a lovely ATC Kelly and you've made a lot of work of the card as well. Had to grin about your typo (sheep protector). Good to see you posting again. my ATC is almost done, it has a flower on it, suppose that doesn't surprise you.
That ATC looks great!
(By the way, I also joined this swap.)
Hi Kelly, I found your blog through the new ATC swop yahoo group. I was part of the 2009 swap. I've enjoyed looking through all of your blog, it's so informative! Great for a novice of mixed media like myself. I love the way you've done this ATC and presented it.
Post a Comment